Posts Tagged ‘tutorial’

Tip of the Day

Monday, April 4th, 2011

img_8460

I am lucky enough to know many talented knitters and I often have the opportunity to pick up some great tricks of the trade from them. There are so many little pieces of advice that can make a project flow more smoothly. Most of the time I’m very willing to try something new and different. I’ll just whip out some needles and yarn and give a new technique a whirl. Unfortunately there are other times I think to myself, yeah, yeah, the way I’m doing it is fine, why fix what ain’t broke? This has been the case when a few people have given me a trick for a nice join when working in the round.

My old way of doing things was to just knit into the first stitch I cast on when joining for working in the round. This would leave a small gap but i would just sew up this gap when I went to weave in my tail. Works every time, why get fancy? Right? Wrong. I finally gave in and tried a different method:

Cast on 1 extra stitch

Transfer this stitch to your left hand needle.

Knit the first 2 stitches together (that’s the extra stitch you cast on and the first stitch of the round together)

Simple right? It’s easy, it makes a flawless join, what more could anyone want? Now it’s the only way I cast on for knitting in the round. So, I pass this small piece of wisdom on to you, give it a try next time you cast on anything circular and be amazed at the difference.

Tip of the Day

Friday, October 15th, 2010

Sometimes there are things I hear in the knitting world that just make perfect sense. It’s the kind of thing you hear and you can never forget it and you wonder how you ever did things before. It’s like the construction of a top down sweater. It’s not that’s I’ll never knit a sweater top up again, just certainly not as often.

crw_9527

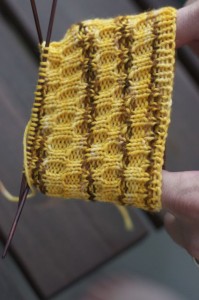
One of the things I have picked up over the years, and people seem to like, is double pointed needle stitch distribution. It works for anything you are knitting in the round but I find it most helpful for socks and mittens. Here’s the big secret: put half of your stitches on needle one, and distribute the other half over needles two and three. So, if you have 60 stitches you’ll put 30 on needle 1 and 15 on needles 2 and 3.

Alright, I know this sounds pretty simple (and it might not be all together earth shattering) but I’m telling you, it makes life so much easier! First of all, you can avoid those pesky stitch markers, which can’t really mark the first stitch of the round unless it’s in the middle of the needles, which it pretty much never is. If you are knitting in the round on circular needles stitch markers are essential and helpful, but they just get in the way on double points. The beginning of the round is always the start of the ‘big’ needle (the one with the most stitches). Simple right?

crw_2944

For socks this system is great because the top of the foot is always on needle one, no ladders on the top of the foot where everyone will see. For fair isle mittens this is great because 1/2 of the pattern goes on needle 1 and the other half goes on the other two needles. This way you know if you’ve made a pattern mistake halfways through, instead of having to rip back an entire round. So, next time you are knitting away on your double points, give this method a try, you won’t go back!

Needles 101: Circulars

Thursday, September 9th, 2010

crw_2523

So I had this great idea for fall: I will finish all projects that are on the needles. Period. No ifs ands or buts. The problem I have discovered is that I have a slightly obscene number of needles. Needles of all shapes and sizes too: circulars (mostly), double points, and straights. I even found some needle duplicates which was a little annoying. I long ago found organizational solutions for my needles so that’s all well and good and I even downloaded an i-phone app to avoid purchasing duplicate needles in the future. What got me thinking was the sheer number of types of knitting needles and the variety of materials they are made of.

This had me wondering how do people know what needles are best for them and their project? It often comes down to personal preferance or budget as far as materials go, but I have a few needle thoughts that might help those who are trying to decide which needles are the ones for them. There are so many, I think I will start with my personal fave: circulars.

Circulars: Some people use circulars and circulars only. You might be wondering how they can make something like a sock on circulars but there is in fact 2 different ways of doing that. You can use the Magic Loop method and make a sock on one needle, or you can use 2 circulars. This goes for sleeves or hats or anything with a small circumference.

What are the benfits of the circular needle? The weight distribution is a big one for me. I like that the bulk of your knitting is in the middle of the cord, as opposed to straight needles which have you moving the weight from side to side. It’s not really a big deal for smaller items, like hats, but for a sweater this can be a major issue. Carrying a lot of sweater weight from side to side can not only impede your knitting, but it can give you tension issues as well. The other benefits include the large number of stitches you can carry (an entire blanket’s worth if necessary), and the avoidance of double points. If you are like the many people who either hate using or are a little scared of double points (I am, for the record, not one of these individuals, I love dpn’s), circulars are a lovely solution. You don’t get ladders like you might with dpn’s either, another plus.

The down side? There are what seem like a million permutations of needle size and cord size. I personally own about 4 pairs of 4.5mm circulars in various lengths. If you are an Addi Turbo addict like myself this can start to add up and cut into your yarn budget! It can also get annoying if you decide that you will use your 47″ 4.5mm circular to make something that is really only 24 inches across. You end up with a rather obnoxious amount of cord in your way at all times.

The solution to this is really a click or interchangeable set of circulars. It’s a larger one time expense but I think it’s really the way to go. You get almost every needle you will need in one shot and you always have the right size cord and needle for the job. We have a plastic interchangeable set in the Denise kits and we’ve got the Addi Turbo Set and the Hiya Hiya set. We are still awaiting the Addi Lace interchangeable set (some, like me, are waiting with baited breath). Come on down and we would be happy to walk you through which set is the one for you!

GCC: Blocking 101

Monday, April 26th, 2010

crw_9053

There are a lot of things in the world of knitting that are debatable. Some of these questions are even unanswerable because they are really just a matter of preference. Needle choice, for example, is largely a question of preference. Some knitters will choose straights over circulars, long over short, bamboo over addi, etc. Will anything terrible happen to your knitting if you use Addi Lace needles (my faves) vs. Bamboo circulars for a given project or vice versa? No, it’s a matter of what makes you happy. Do what you feel! What does this have to do with blocking you might ask? Nothing really, it’s just that blocking is one of those knitting issues that is really just a matter of debate that I think comes down to preference.

There is much debate on the purposes of blocking and when, why and if it should be done. This intro is kind of acting as a disclaimer, there are lots of schools of thought on blocking and I’m really just sharing my own. Do what works for you, as usual. There are different ways to block different items and I thought I would start with something I’ve done a fair bit of lately: some lace.
crw_8935

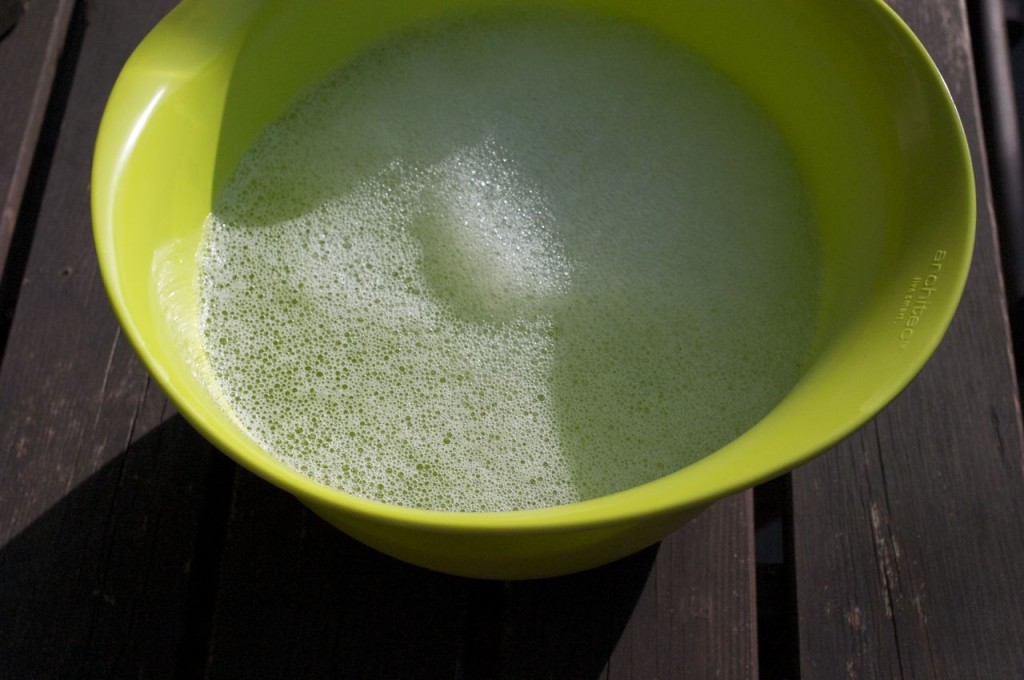
Step 1: fill a bucket, sink, or bowl with cool water. I use a bit of SOAK in my water, it’s a wool conditioner that smells nice and softens your finished project.

crw_8942

Step 2: put your finished shawl into the water and gently squeeze out the bubbbles. When no more bubbles come out, you know the water has completely permeated the yarn, making it easier to have the shawl stay the way you want it when you lay it out.

Some would disagree with this full immersion approach and would make the shawl damp with wet towels. It’s another way to go but I’m not that gentle with my knitting. If I’m going to be wearing something I think it should stand up to a certain amount of abuse. DO NOT use hot water. It will felt your knitting and unless you are going for that felted look you will be sad. There might be tears. Don’t let this happen to you.

Step 3: Roll your shawl in a towel to get out some of the excess water. Use a dark towel if you are nervous about running colours.
crw_8946

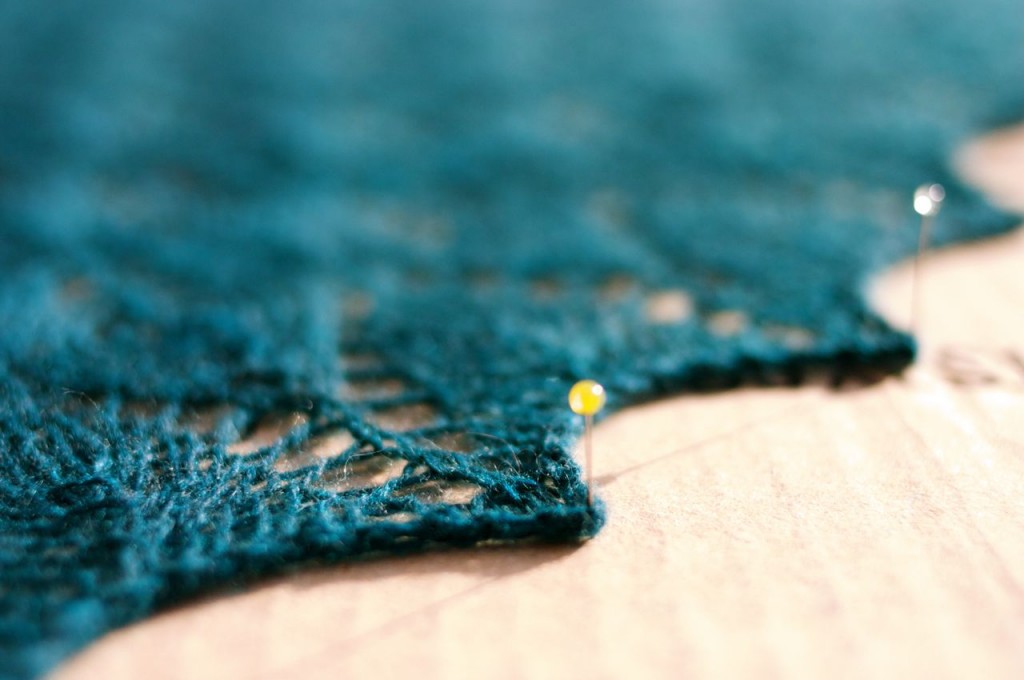
Step 4: I used to to pin my shawls to a towel but Emily set me straight on that. She uses cardboard for a good stiff blocking. I tried it and I agree. I got a big cardboard box and broke it down so I had a nice big surface. Then I laid out my shawl and put quilting pins through the points on the shawl. Each shawl will most likely have it’s own natural points, you’ll know, don’t worry. Just put your pin through the point stitch and then through the cardboard. Lace really looks amazing when it is blocked rather severely so don’t be afraid to really stretch it! FYI: I don’t recommend using quilting pins, I didn’t have t-pins (which I do recommend) so I used the quilting pins I had and I kind of wrecked them. I am so impatient sometimes.

Step 5: Let it dry, unpin and enjoy!

This is kind of a severe way to block. Others suggest that you block it slowly and gradually. I am obviously much too impatient for that. Also having a giant piece of cardboard taking up my living room is probably already pushing hubbies patience so keeping it there for an extended period of time is just plain not going to happen.

If you are blocking a sweater, scarf, blanket, some fair isle mittens, or really any other piece of knitting you probably won’t need pins. Again, others might disagree but I think it’s kind of overkill to pin down a scarf. Unless you need points of any kind, then you will need pins. There are always exceptions!

If I’m blocking any one of these items I will repeat steps 1-3 but then I will lay it out on a dry towel the way I want it to look (uncurled edges, straight seams, even stitches etc.) and let it dry that way. If it’s a sweater it can take a while to dry (beware the Christmas Eve block. That’s a story for another time…..) so I would change the towels every so often to speed drying. You are really just smoothing things out, those funny stitches and crooked seams. Fair isle items always look much better after a block, much smoother and more even.

If you are interested in some other opinions or techniques you can check out these sources on blocking as well (some of these dedicated individuals are much more serious about their blocking than I am!)

Yarn Harlot

Emily Wessel

Brooklyn Tweed (blocking wires)

Purl Bee

Knitting Daily

Posie Gets Cozie

Enjoy!

–Alexa–
GCC: Subbing 2.0: How much?

Monday, April 12th, 2010

crw_8042

Back by popular demand is the subbing tutorial. What I neglected to mention in the last post is how to tell how much yarn you will need! Another popular question around the shop is ‘How many skeins will I need for a _______’. While we are always near by with a calculator around the shop, here are a few tips to figure out how much yarn you will need.

One of the things I hear a lot is yarn requirements that are given by weight. There are many patterns in the world that are written with amount requirements in ounces or grams, especially (although not restricted to) older patterns. Elizabeth Zimmerman, for example, gives weights in all of her patterns. I have a theory about this: there are just more yarns out there now. If there are only a few types of yarn, mostly wool, it’s easy to go by weight. Now, there are so many different yarns and fibers, I just don’t think weight is accurate enough.

Lots of people come to UY looking for 4 oz of wool or five 50 gram balls. This works fine if you are using the exact yarn in the pattern, meaning the same brand of yarn. If you have a Debbie Bliss pattern and you are using Debbie Bliss yarn you are good to go! Simple. As soon as you start subbing this becomes a problem. Here’s why: different fibers weigh different amounts for the same yardage. Alpaca and angora are very light fibers, so you will get more yardage for the same weight. Silk, on the other hand, is a lot heavier than wool. If you have a fiber that is a mix, then all bets are off and I would look to our good friend the ball band to tell us how much yardage is in there.

So what should you do if you want to start subbing yarns?

Step one: check out the original yarn. If you are subbing you will already want to look up the gauge so make a note of how many yards per skein while you are at it. A couple of things to be careful of though:

  • make sure you are measuring either meters or yards and keep it consistant. There are 109 yards per 100 meters FYI.
  • The other thing to be careful of is the occasional change in skein size. Every once in a while a yarn company will change the size of their skeins from 50g to 100g or vise versa or something else entirely. Make sure you are looking at the same size skein.

Step two: Once you have determined how many yards per skein the original yarn had, do a little multiplication and figure out how many yards you will need to make your sized garment.

Step three: check how many yards (or meters) the yarn you are substituting has. Yardage needed divided by the yardage of the substituted skein gives you the number of skeins you will need of the substituted yarn.

Now, the above advice is great if you are working from a pattern but what if you are that wild knitter who is stashing for the right pattern to come along or *gasp* designing their own garment? Well, it is a little tougher but there are a few basic guidelines you can follow in a lovely little pamphlet of yarn requirements. It’s been my yardage bible for the past couple of years, you can pick one up at the shop for about $6 and it’s an invaluable tool. The Knitter’s Handy Guide to Yarn Requirements.

I would also recommend buying an extra ball or skein, especially if you are making a garment. It is exchageable if you don’t need it and I have seen more than a few regrets over unpurchased extra yarn. Remember that every knitter is a little different and sometimes the best laid plans can go awry. Even if all signs point to 8 ball, you just might need a little bit more.

Voila! Now you’ll be able to sub yarns at will. Don’t let substitutions scare you, being able to knit things many different ways, with different yarns, fibers, and style is what makes knitting so great. It makes each item unique. Also, we would be happy to walk you through substitutions in the shop any time!

–Alexa–